Intro
In the previous post I introduced what we're doing so if you haven't read that, do that first or this won't make much sense.
At the end of the previous post we concluded that we'll need to reverse engineer the driver to understand the protocol. In this post, we'll get started on that, but this is a long process and I don't know if I'll succeed. We'll just take it one step at a time.
This post assumes you are already familiar with the basics of reverse engineering and have a rough idea what a DLL is. If not, I suggest as you follow along, if you don't understand something, go research it, as the rest of the analysis won't make much sense otherwise.
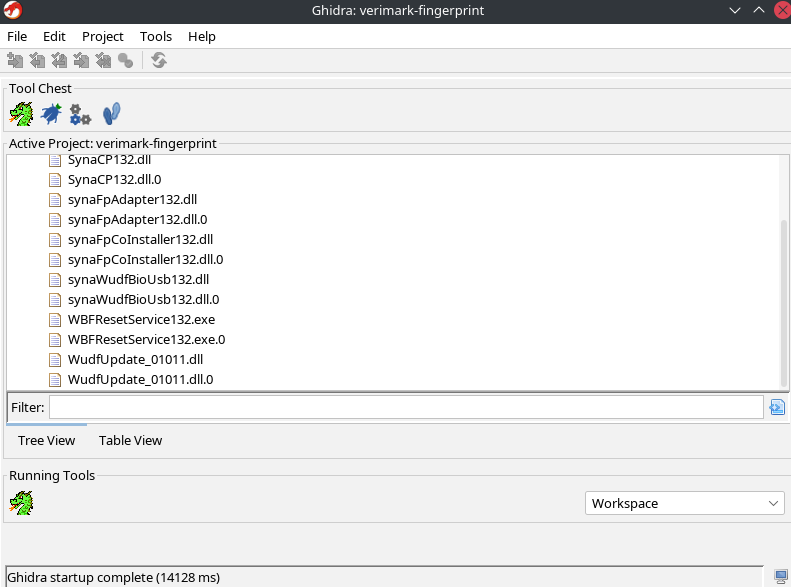
To start, we need to download the driver and unpack it. This gives us these files:
% ls -1
KensingtonFingerprintApplication.exe
KensingtonFingerprintApplication.lnk
SynaCP132.dll
synaFpAdapter132.dll
synaFpCoInstaller132.dll
synaumdf.cat
synaWudfBioUsb132.dll
synaWudfBioUsb.inf
'VeriMark DT Fingerprint Key Driver Installation SOP.docx'
WBFResetService132.exe
WudfUpdate_01011.dll
Now we have a bunch of binary files that we need to reverse, but we don't need to analyse all of them, we need to start somewhere. Given that this is a driver, we'd expect the relevant logic to be in a DLL. Then we'll make some guesses to create a shortlist of candidates:
SynaCP132.dll
synaFpAdapter132.dll
synaWudfBioUsb132.dll
Initially, my favourite from this list was synaFpAdapter132.dll due to its
name, but after some research I found that "wudf" comes up as part of the
UMDF Driver Host Process
as Wudfhost.exe (some foreshadowing here, too). After taking a brief look at
all of them and just making some guesses, (e.g. the .inf file of a similar
name), I decided that synaWudfBioUsb132.dll was probably the right target.
Loading Up Ghidra
When I was at uni, you basically needed to get your hands on IDA Pro to do any meaningful reversing. However, in 2019 the NSA released Ghidra. This tool is surprisingly good and it's free and open source. As a complete non-expert, even if paid tools are better, I'm sure we'll get a long way with Ghidra before we run into its limitations and wish for a more powerful tool.
This won't be a full Ghidra tutorial, I'm learning as I go and I won't pretend I can teach you anything. If you've never used Ghidra or IDA Pro, you might want to dig up a tutorial first. I will, however, introduce some of its features as I was learning about them.
First, we open the whole folder in Ghidra and see a list of DLLs. Then we'll
open our target synaWudfBioUsb132.dll in the main "tool" CodeBrowser which
will prompt us for an analysis. Just run with the defaults and wait.
Analysis in Ghidra
Where to begin? For an executable file, we'd start at the main function, but
we don't have that here. Instead, in DLLs, we need to understand how they're
loaded. The easiest way is to look at the "Exports" in the "Symbol Tree"
window:
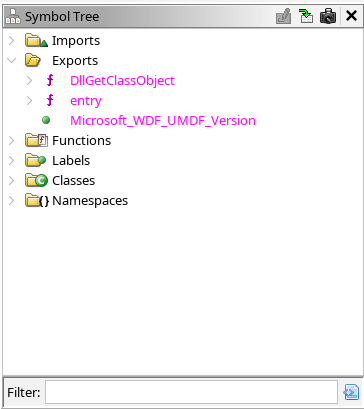
This shows us really only two options: entry and DllGetClassObject but it's
not clear which one we'll need to start with. Since we know we're analysing a
USB driver for biometrics on Windows, the entry point and initial setup
actually needs to be some agreed-upon interface, so rather than poking around
blindly, why not find out from Microsoft what to expect?
Finding the documentation for DllGetClassObject
gives us a function signature:
HRESULT DllGetClassObject(
  [in]  REFCLSID rclsid,
  [in]  REFIID   riid,
  [out] LPVOID   *ppv
);
This doesn't tell us too much, but reading the documentation gives a few more
hints, and with more searching it's possible to find
How to write your first USB client driver (UMDF)
which describes some basics, including a reference to IUnknown which is a
parent interface to IClassFactory that the ppv out value needs to
implement. Here's the decompiled function Ghidra creates:
/* WARNING: Function: _guard_dispatch_icall replaced with injection: guard_dispatch_icall */

HRESULT __stdcall DllGetClassObject(IID *rclsid,IID *riid,LPVOID *ppv)

{
  longlong lVar1;
  HRESULT HVar2;
  longlong *plVar3;

                    /* 0xdb50  1  DllGetClassObject */
  *ppv = NULL;
  lVar1._0_4_ = rclsid->Data1;
  lVar1._4_2_ = rclsid->Data2;
  lVar1._6_2_ = rclsid->Data3;
  if ((lVar1 == 0x4b29b08096710705) && (*(longlong *)rclsid->Data4 == 0x3a66ae3569b1eca3)) {
    plVar3 = (longlong *)operator_new(0x10);
    if (plVar3 == NULL) {
      plVar3 = NULL;
    }
    else {
      *(undefined4 *)((longlong)plVar3 + 0xc) = 0;
      *plVar3 = (longlong)&PTR_FUN_1800b8828;
      *(undefined4 *)(plVar3 + 1) = 1;
    }
    if (plVar3 == NULL) {
      HVar2 = -0x7ff8fff2;
    }
    else {
      HVar2 = (**(code **)*plVar3)(plVar3,riid,ppv);
      (**(code **)(*plVar3 + 0x10))(plVar3);
    }
  }
  else {
    if (((undefined **)PTR_LOOP_180131028 != &PTR_LOOP_180131028) &&
       (((PTR_LOOP_180131028[0x1c] & 1) != 0 && (1 < (byte)PTR_LOOP_180131028[0x19])))) {
      FUN_18000dcc0(*(undefined8 *)(PTR_LOOP_180131028 + 0x10),10,&DAT_1800b8808,rclsid);
    }
    HVar2 = -0x7ffbfeef;
  }
  return HVar2;
}
And here's Microsoft's example code:
HRESULT _export CALLBACK DllGetClassObject
    (REFCLSID rclsid, REFIID riid, LPVOID * ppvObj)
{
    HRESULT hr = E_OUTOFMEMORY;
    *ppvObj = NULL;

    CClassFactory *pClassFactory = new CClassFactory(rclsid);
    if (pClassFactory != NULL)   {
        hr = pClassFactory->QueryInterface(riid, ppvObj);
        pClassFactory->Release();
    }
    return hr;
}
Note: If you followed along, you might not see all these nice symbols being
filled in, for example the IID * and LPVOID *. If so, you need to obtain
the right header files and give them to Ghidra. I'm not the best person to
explain this, because I fumbled around for a bit and I think I imported the
same headers from different sources. Some you can find by downloading various
Windows SDKs and Driver Development Kits, some headers are on GitHub etc. I
just kept importing stuff until I had the symbols available, it was a bit
arduous...
Analysis of this function reveals that a C++ class is being created
(operator_new) and then some PTR_FUN_ is assigned. This is usually the
virtual function table (vtable). These make analysis a fair bit harder,
because you often have the this pointer being passed around and if you don't
know what function is at what offset it gets really hard to analyse.
C++ Reversing in Ghidra
It took me a while to find out about this, but I wish I'd known about it at this point: Ghidra does understand C++ classes to some extent and you can use that to make your life a bit easier.
When an instance of a C++ class is created, first memory is allocated using
operator_new and then the constructor is called. In this example, we see
first *plVar3 = (longlong)&PTR_FUN_1800b8828; and later HVar2 = (**(code **)*plVar3)(plVar3,riid,ppv);.
This combination is a function call: The first function in that function table
is called, which looks like this:
/* WARNING: Function: _guard_dispatch_icall replaced with injection: guard_dispatch_icall */

undefined8 FUN_18000dae0(longlong *param_1,longlong *param_2,undefined8 *param_3)

{
  undefined8 uVar1;

  if ((*param_2 == 1) && (param_2[1] == 0x46000000000000c0)) {
    *param_3 = param_1;
    (**(code **)(*param_1 + 0x28))();
    uVar1 = 0;
  }
  else {
    *param_3 = 0;
    uVar1 = 0x80004002;
  }
  return uVar1;
}
The Software Reverse Engineering with Ghidra -- C++ Classes part1 video
does a great job of explaining what to do here, so I won't go into detail. In
the end you should be able to recreate some parts of the class with the
vtable field being the first in the struct. Name the fields in the vtable
struct according to function names and you can at least manually navigate
between vtable offset and function in the Symbol Tree.
When dealing with constants in code it can be really helpful to find out what
they mean. To do this, right click and choose "Equate". For example, the value
0x80004002 is obscure, but you can turn it into E_NOINTERFACE which makes a
lot more sense. This doesn't work for everything, you need to have the
constants defined somewhere (usually imported headers), but I found it really
helpful to understand which parts are the "error" vs "success" branches of the
code. If you have a HRESULT, understand that S_OK is the success value and
find it via "Equate".
And now begins the hard part: Tracing through the decompiled code, creating classes & data structures, slowly putting the pieces of the puzzle together. This is somewhat tedious and you just have to get through it. I'll describe more techniques I used in future posts.